This page is designed to get you ready to start HOP. If you’ve been riding HOP for a while and have already read this, you may want to skim through it as we’re always updating and innovating the program.
Classes will be LIVE every Tuesday and Thursday with two class options on each day. You DO NOT have to do the same class every time – all good to hit morning one day and evening the next. These will be the same workouts.
Start Date: Dec 2, 2025
End Date: March 5, 2026
Morning session: 5:30 CST. Class will finish with stretching by 7:00 am. Led by Coach Jonny Brown or Coach Heather Nichols.
Evening session: 6:00 CST. Classes will finish by 7:30 pm. Led by Coach Bryant, Coach Dale, Coach Heather, or Coach Mason
HOLIDAY CANCELLATIONS – NO CLASS: Dec 25th or Jan 1st
IN PERSON THRESHOLD TEST OPTIONS:
SESSIONS 1, 13, AND 26 – if you’re in the Memphis area, the EVENING threshold assessments will have an in-person option. We will meet at the Memphis Hightailers clubhouse – 397 Cumberland St, Memphis, TN. They will be streamed live if you cannot make it and will also be recorded.
The virtual classroom will open by 5:25 am for the morning class and 5:55 p.m. CST for the evening class. The same link will be used for all classes.
ACCESS TO THE CLASSROOM LINK – CLICK HERE
RECORDINGS ARE AVAILABLE HERE – NOTE….We will record both sessions each day but there may be variance in audio/visual quality.
If you want to access the recordings you must be signed in to your member.buildpeakcompete.com/login account.
In order for you to get the most out of the classes, it’s important for our coaches to be able to see you so they can offer tips on positioning and technique as well as to make sure you’re suffering the right amount.
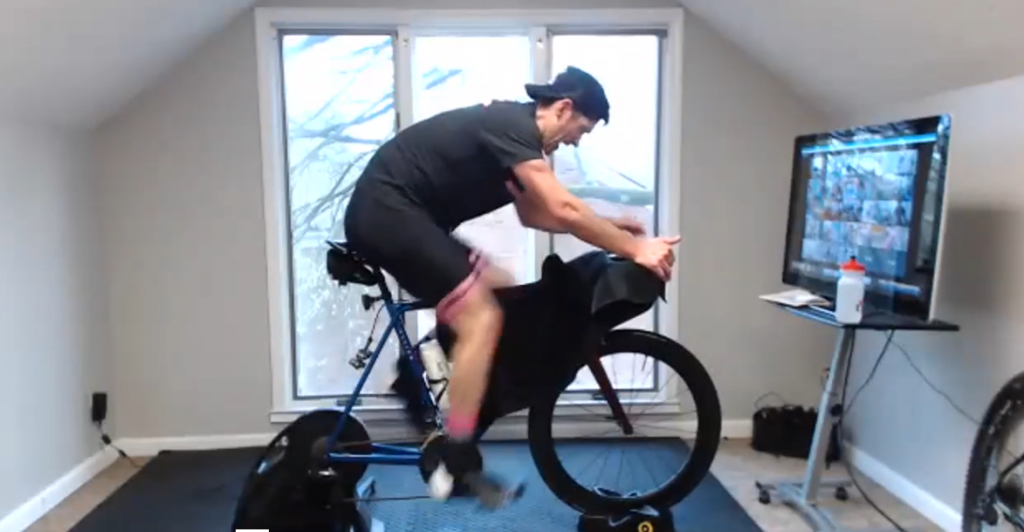
When setting up your camera, device, or webcam you’ll want to position it at a 90-degree angle from your bike with it centered in the middle of the visible frame on your screen. You may need to adjust the distance of the camera to the bike in order to capture your whole bike and body. Check out this camera view of Coach Bryant’s setup.

Use a Single Device:
You can use a single device for your screen and camera, like a cell phone, smart tablet, or laptop webcam. With this set up your device is perpendicular to the side of your bike. While this setup lets you utilize a single device, your screen will not be in front of your bike so you will have to turn your head while on the bike to see what’s happening in the class.
Use Multiple Devices or Screens:
The other options are much broader.
We’ve tested several webcam setups and have found a good, affordable webcam that works very well for this specific situation. If you want to use the same webcam we do, you can find it on Amazon HERE
You’ll definitely need a trainer, but knowing which one to buy is all about you. Here’s a quick guide:
If you’re on a budget, we recommend going with a FLUID TRAINER. These are usually more affordable and still work well. They are also louder than some of the higher-end trainers but they still get you rolling.
If you want more of an investment, you can look into getting a smart trainer. These are normally quieter plus they can automatically adjust the resistance from different apps. They also communicate with Bluetooth and ANT+ devices to personalize training sessions and track data from things like heart rate monitors and power meters.
Access to our Training Peaks Program is FREE to all HOP Cycling members. We designed this program to give you all the workouts in advance to help you get your levels and zones dialed in for the day.
NOTE: The beauty of the HOP is that we don’t always follow the script because we don’t always want you PACING YOURSELF for the efforts to come. Be prepared for the workout to change at times. Hooray for MENTAL ADVERSITY TRAINING (MAT)! Amirite?!
Three times we do “Zone Setting” – Sessions 1, 13, and 26! The day after each of these, the coaches will go in and set (or reset) your zones IF there is ride data that has uploaded to Training Peaks (see Step 6).
Here’s a video on how to LOCATE your training zones. During the sessions, your coach will tell you to be in “Zone 1, 2, 3, etc” – so you can write them down, print them out, memorize them, input them into your bike computer…whatever allows you to know what heart rate or power range correlates to each zone.

The HOP Cycling Private Facebook Group is a great place filled with encouragement from coaches and other riders, tips and tricks from experienced HOPers, and a place to commiserate the death of your legs from last night’s session. Really, it’s a great way to become a part of a community and avoid feeling alone in this sweaty journey.
Note: you DO NOT have to use Zwift or any other virtual platform (might be better if not…), but we know some people do. A few key notes if you are going to use these.
